The filter bar
Press ⇧⌘L, type a condition, press Return.
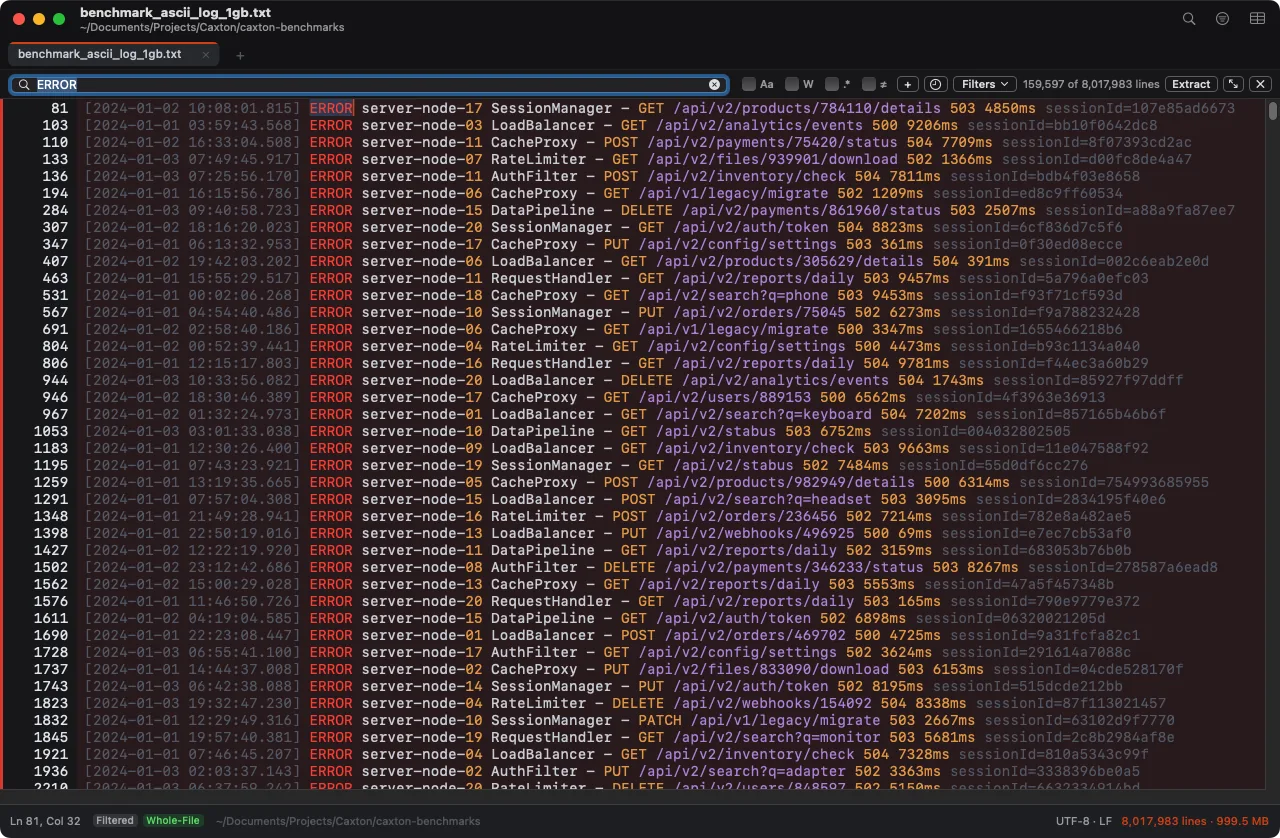
Only the matching lines remain visible: 159,597 of 8 million. The gutter keeps the original line numbers.
- Per-condition toggles: Aa case, W whole word, .* regex, and ≠ to exclude matching lines instead.
- In a log document the bar gains a Severity popup: Warn and above, Error and above, Fatal only, Info and above, Debug and below, or lines with no severity word. It is a gate over every condition in the bar and the digest (AND, OR and negation included), and the digest says so: Severity: Warn and above over all rows. It reads the same words that tint the rows (ERROR, WARN, INFO, DEBUG, FATAL and their relatives, plus your own from View ▸ Log ▸ Severity Patterns…, which win). A line that has no level word of its own and no timestamp follows its record, so the stack trace under an ERROR line stays with it, up to 4,096 lines or 1 MB back to the first line of the record, the same reach Go to Time and Extract Incident Window use. Changing the patterns re-runs an active severity filter.
- Filtering 80.6 million lines takes about 1.0 s (measured).
- Editing while filtered works; if a change makes results stale, a Refresh chip appears rather than the view churning under you.
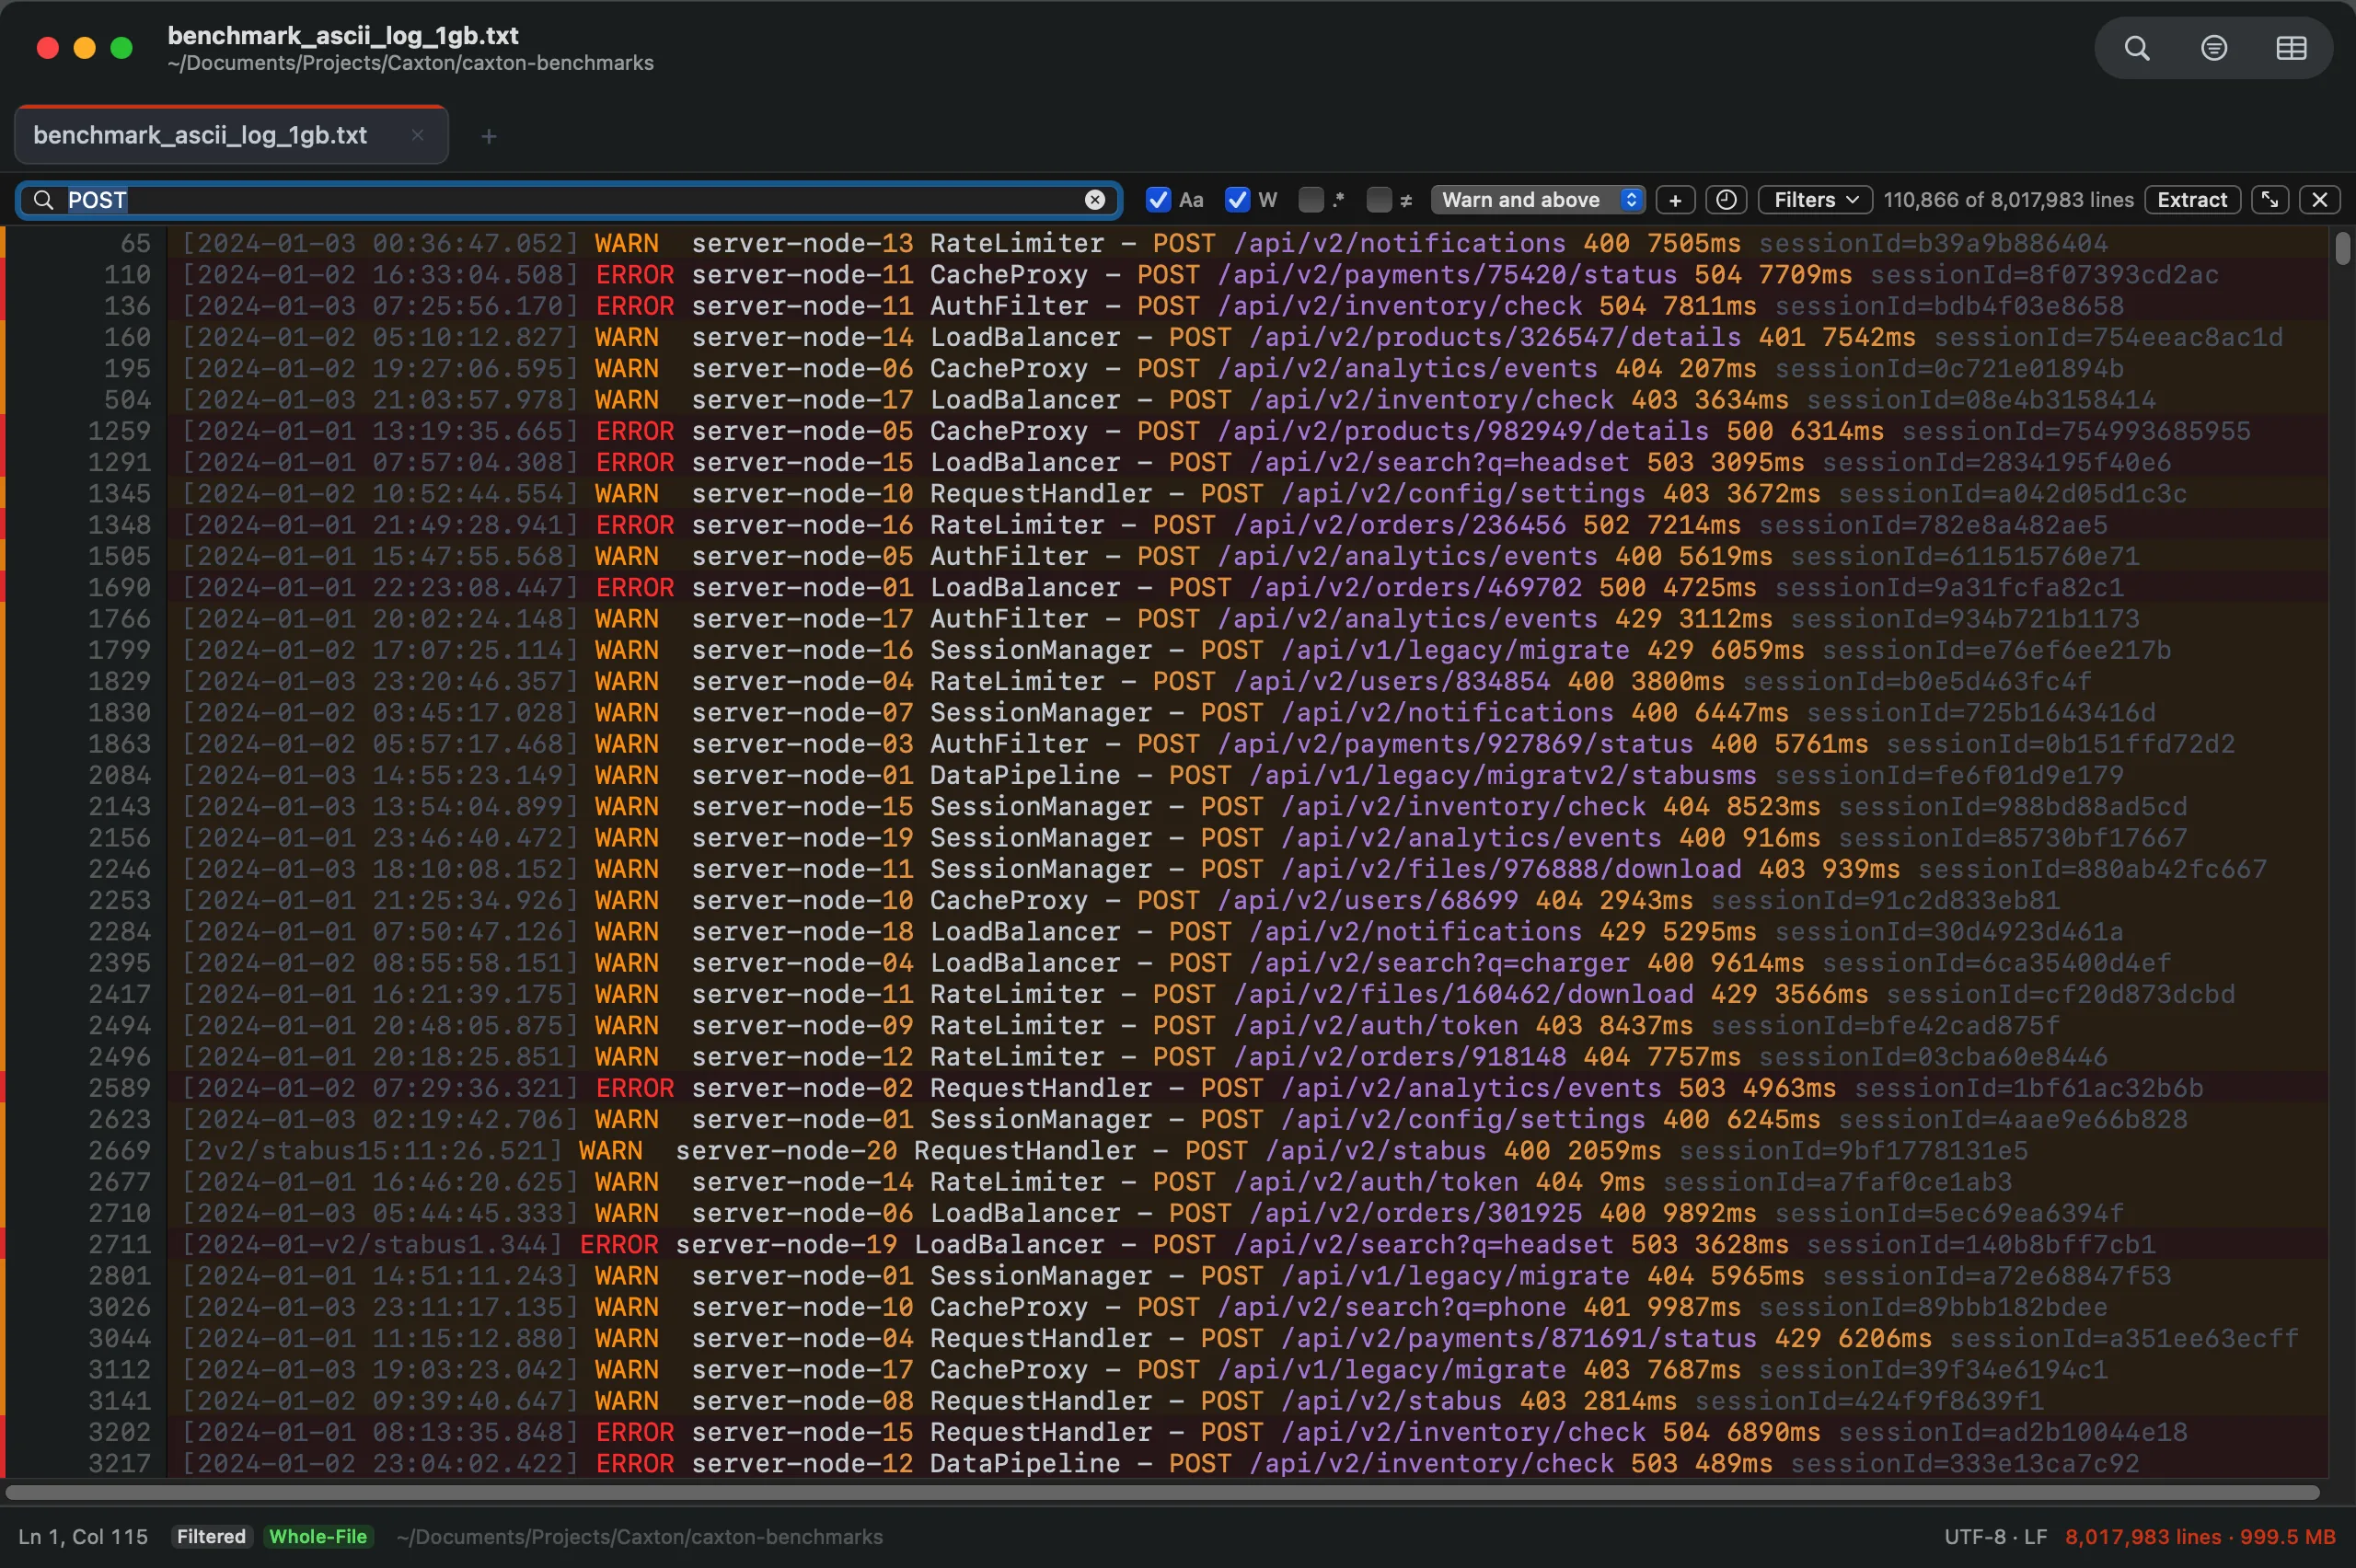
POST with Severity: Warn and above on the 1 GB log: 110,866 of 8,017,983 lines. The popup gates the text condition; the counter is exact.
- Closing the bar (✕) clears the filter and restores the full view. Esc returns focus to the editor and keeps the filter.
Multiple conditions
Click + to add conditions in the Filter Lines panel. Conditions chain with per-row AND/OR joiners (AND binds tighter), and each row has its own case/word/regex/≠ toggles. A row can be a text condition, a Severity level, or a Time window (From and To in the Go to Time forms, blank for an open edge, read in the log\'s own zone; a To edge typed without a fraction covers its whole second, so 14:10:59 includes 14:10:59.999). Any row can match by log severity instead of text: pick a level in the row's Severity popup and the text field goes quiet for that row. The Severity popup in the bar stays the gate: Apply and Extract All take its current choice, even one made after the panel opened. The panel button is mode-aware: in Table Mode the same button opens the grid's Filter Rows panel instead, where each condition can target the whole line, any column, or one specific column, and compare with Contains, Does Not Contain, Equals, Greater Than, or Less Than.
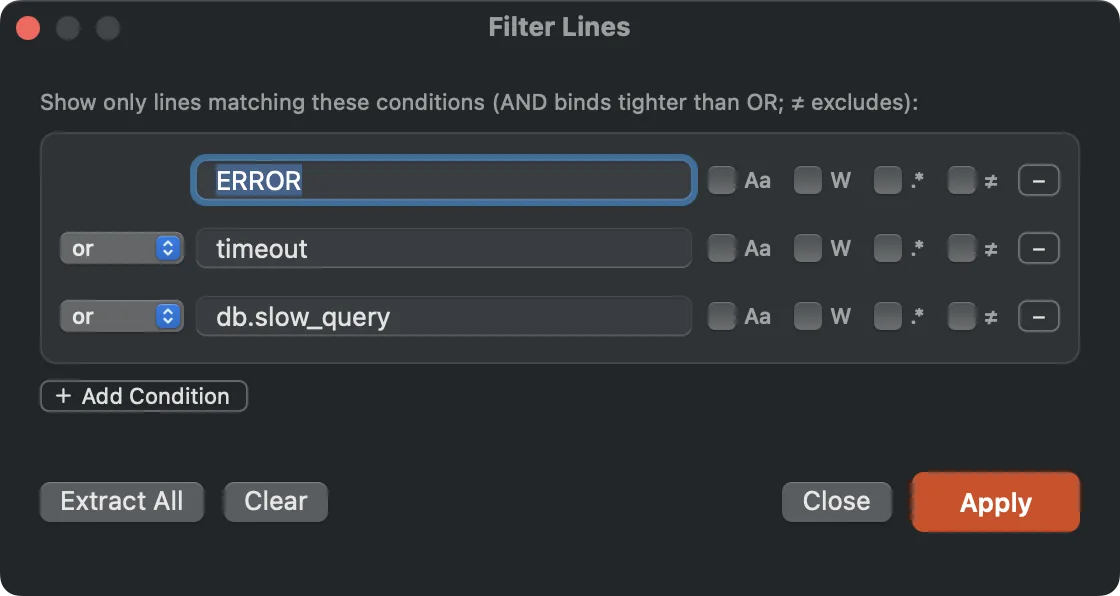
The panel owns every condition. Apply runs the whole chain; Extract All sends the matching lines to a new document.
In the bar itself, extra conditions never stack rows; they fold into a one-line digest under the query field. Click the digest to reopen the panel.
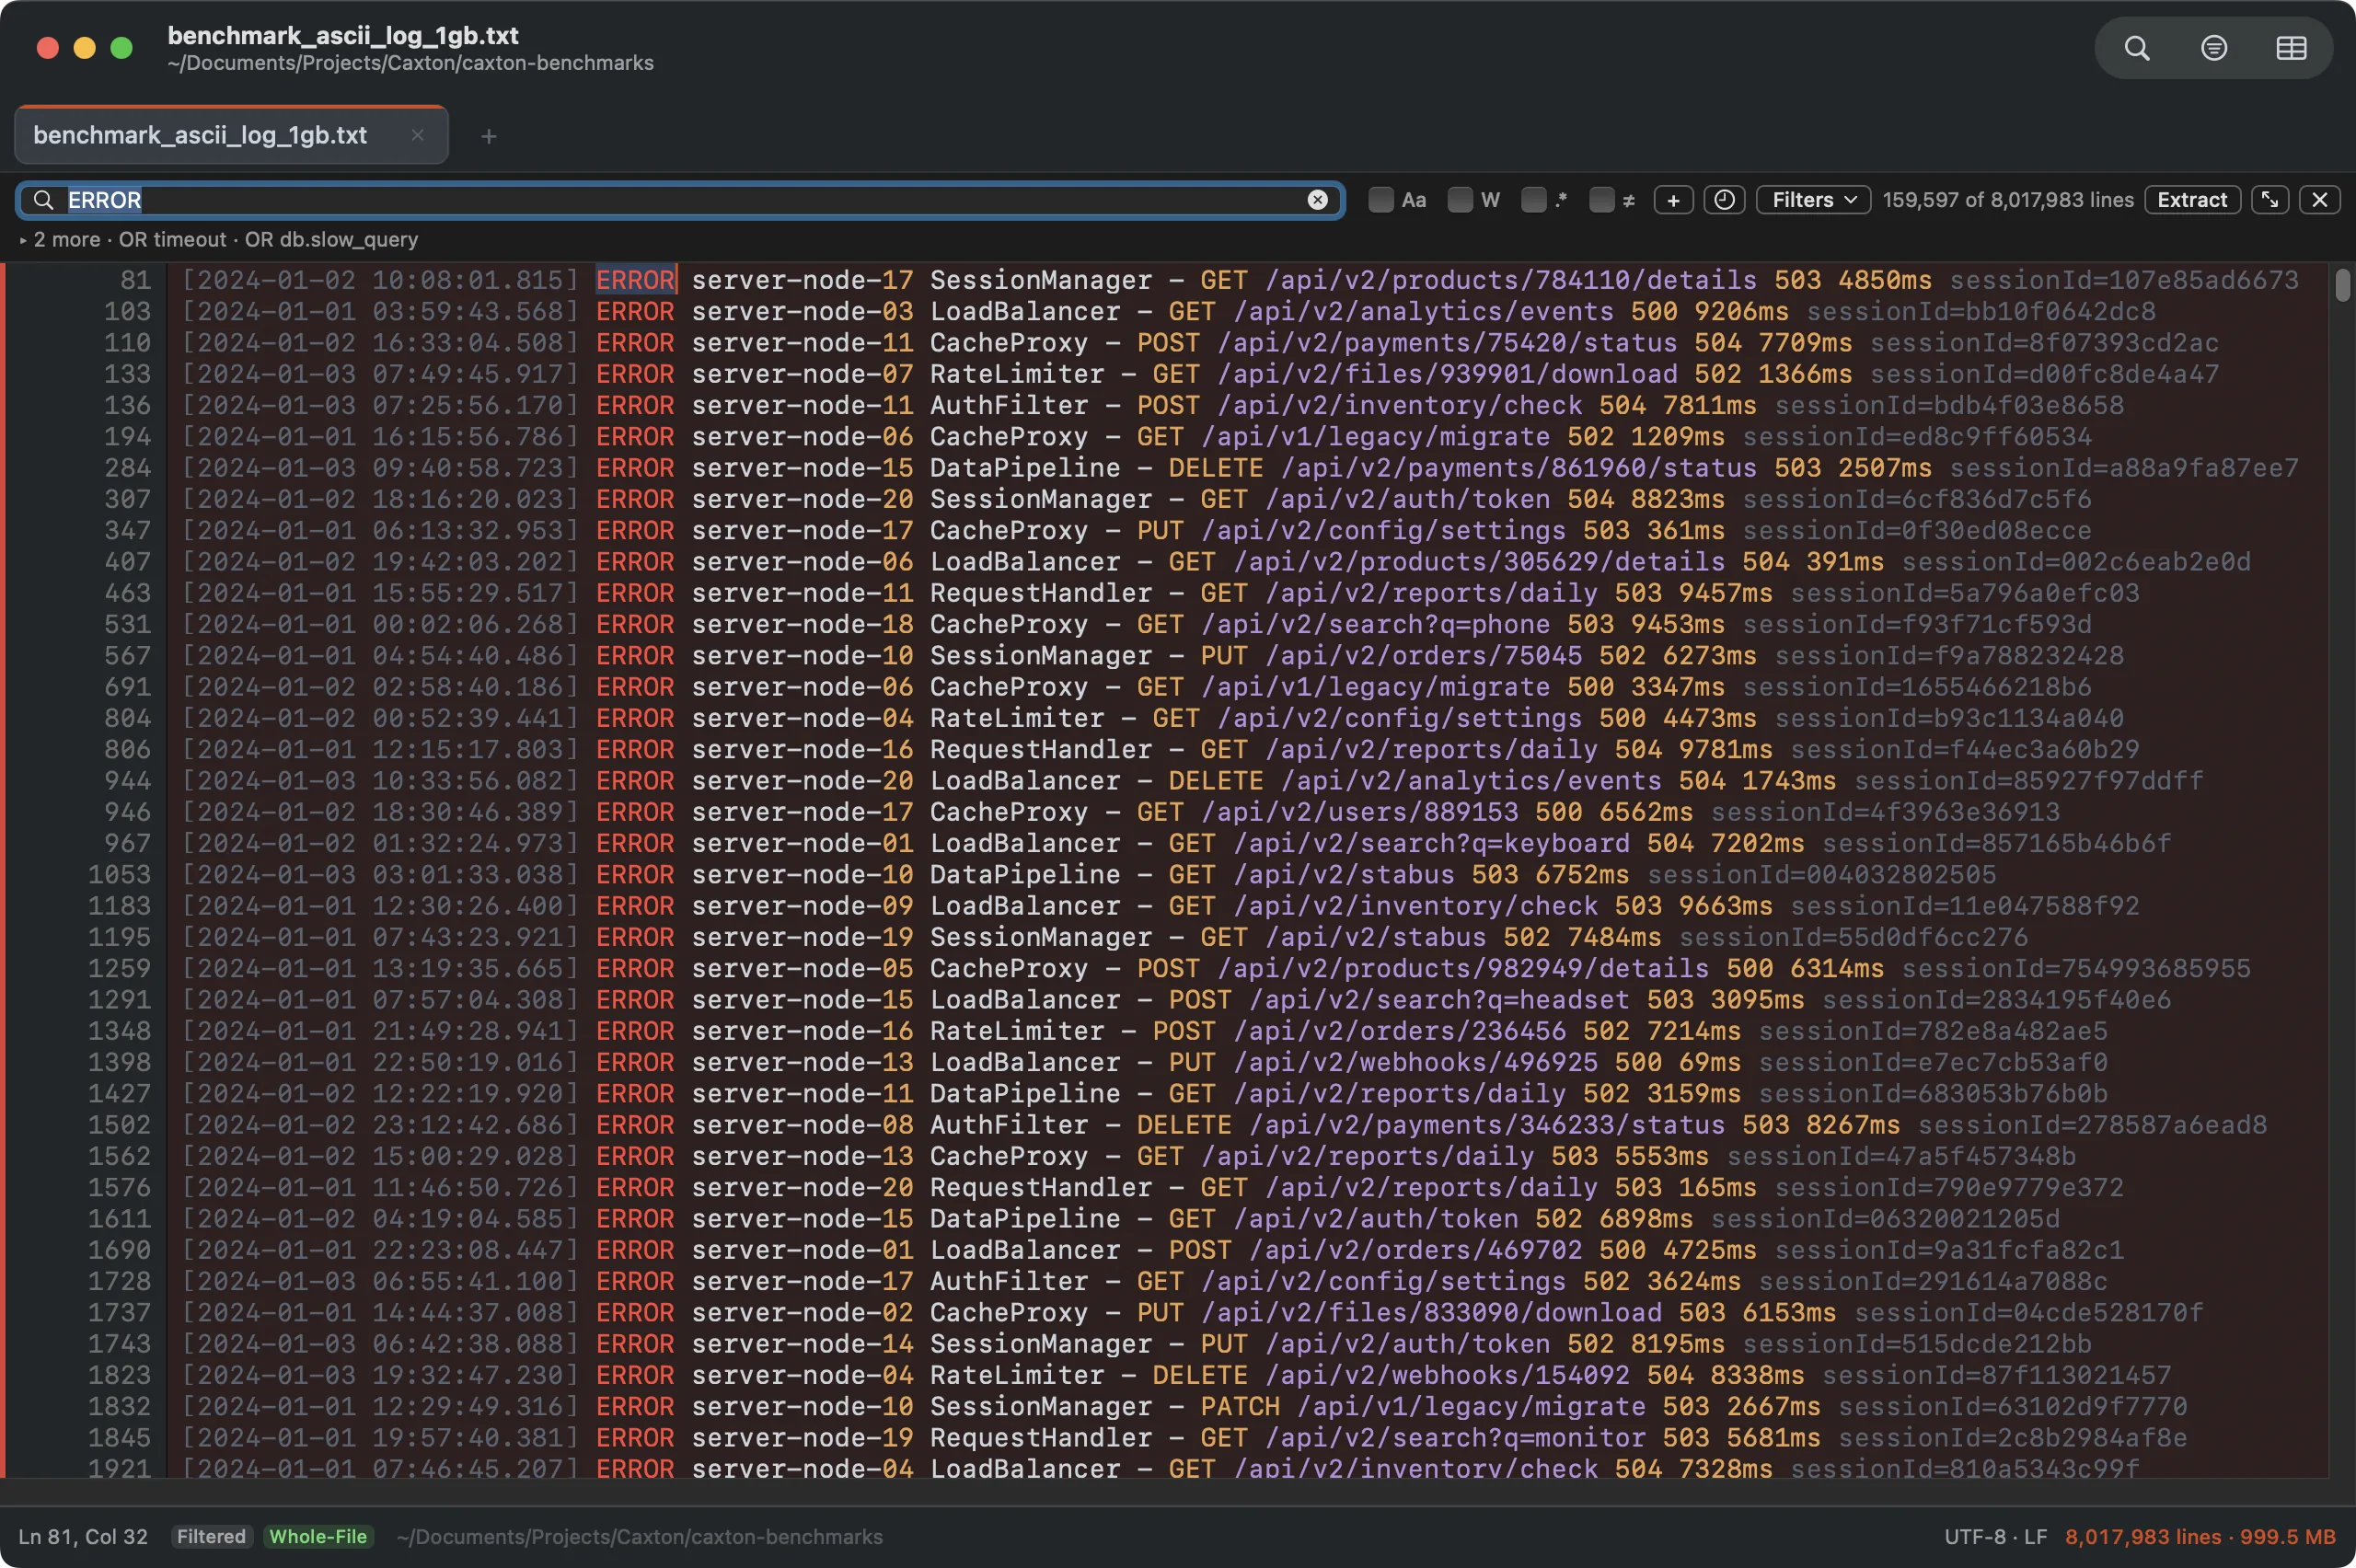
Three conditions active, one slim line of chrome: the digest reads the whole chain back to you.
Working with results
- Extract (Extract All in the Filter Lines panel): copy every matching line into a new untitled document. If the filter timed out before covering the whole file, Extract says so and refuses rather than export a partial view.
- Edit ▸ Bookmarks ▸ Bookmark All Filtered Lines: bookmark the visible set.
- Presets: save a condition chain by name and recall it from the bar's Filters menu; recent filters live under the clock icon.
- Import: drop a text file (up to 1 MB) on the bar and each non-empty line becomes an OR condition, up to 12 conditions; the banner says how many of the file's terms were taken.
- Delete Lines Matching… (Text menu): the destructive sibling: removes matching lines, streaming to a new document when the result would be enormous.
Saved filters
The bar's Filters button opens the menu of saved filters. Save Filter As… opens Save Filter, a form with one Name field: Save keeps the bar's whole configuration under that name, and a filter with the same name is replaced. An empty filter has nothing to save, and the status bar says so. Each saved filter is listed by name below; picking one puts its conditions back in the bar. Delete ▸ lists the same names, and picking one removes that filter at once.
Export Filters… writes every saved filter to a JSON file (caxton-filters.json to start); it is dimmed until a filter is saved. Import Filters… reads such a file, on this Mac or another, and adds its filters, replacing any with the same name. Settings & Storage lists where saved filters are kept.
Replacing under a filter
While a filter is on, Replace All changes only the lines the filter shows, unless the find bar's scope line is switched to the whole file (Find & Replace). When the filter hides every line, Replace All does not run and the banner says the filter hides every line, so there is nothing visible to replace. A replace that would change nothing says there is nothing to do.
Slice scope
In slice or tail mode the filter labels itself with the loaded window ("filtering loaded slice (500 MB of 50 GB)") and offers Entire File, which scans past the loaded slice on disk.